
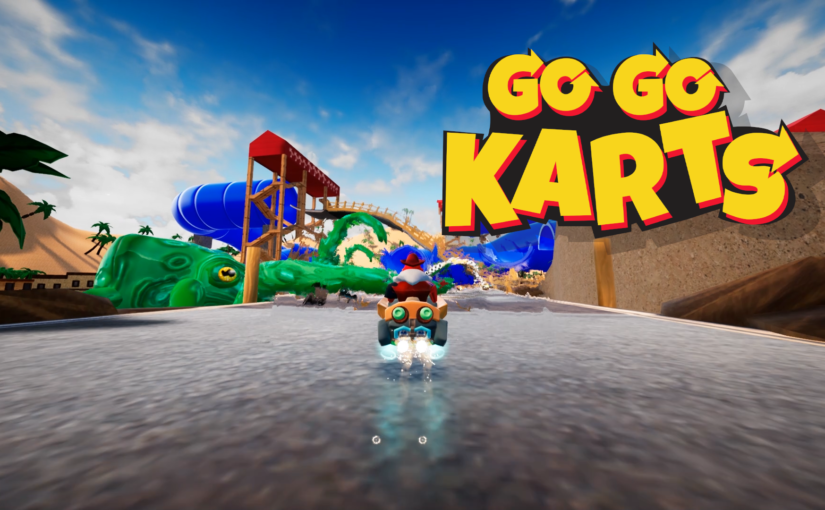
What is Go Go-Karts?
Go Go-Karts is a 3D competitive couch multiplayer arcade kart racing game for the PC platform where players take control of a variety of characters who compete for the coveted winner’s tournament trophy. Players jump, drift, boost, and battle their way through unique tracks in a bright, exciting and colorful amusement park. Four available slots for couch multiplayer are allowed and any spaces not filled up by human players will be filled with AI controllers totaling the number of racers to eight.
Development Methodology
Go Go-Karts was developed using an Agile development model with Scrum. The leads and producers planned milestones for the development of the game while the development team implemented features according to milestone requirements.
Development Specification
- Role: UI/UX Programmer
- Engine: Unreal Engine v4.21.2
- Development Time: 3 Months
- Team Size: 45 (9 Programmers)
Game Trailer
My involvement in Go Go-Karts
- Created UI systems for single-player and local multiplayer gameplay
- Implemented independent UI Widgets to allow for easy updates through the development cycle
- Implemented generic controller input for UI systems in-game
- Implemented UI controllers to handle UI flow control in Menu sequences
- Implemented a UI widget based flythrough camera allowing for cinematics using sequences in Unreal
- Worked in Vertical Slice milestone strike team to implement features in short sprints
- Worked in Beta milestone bug fixing team to ensure quality control and resolve experience issues
UI Systems
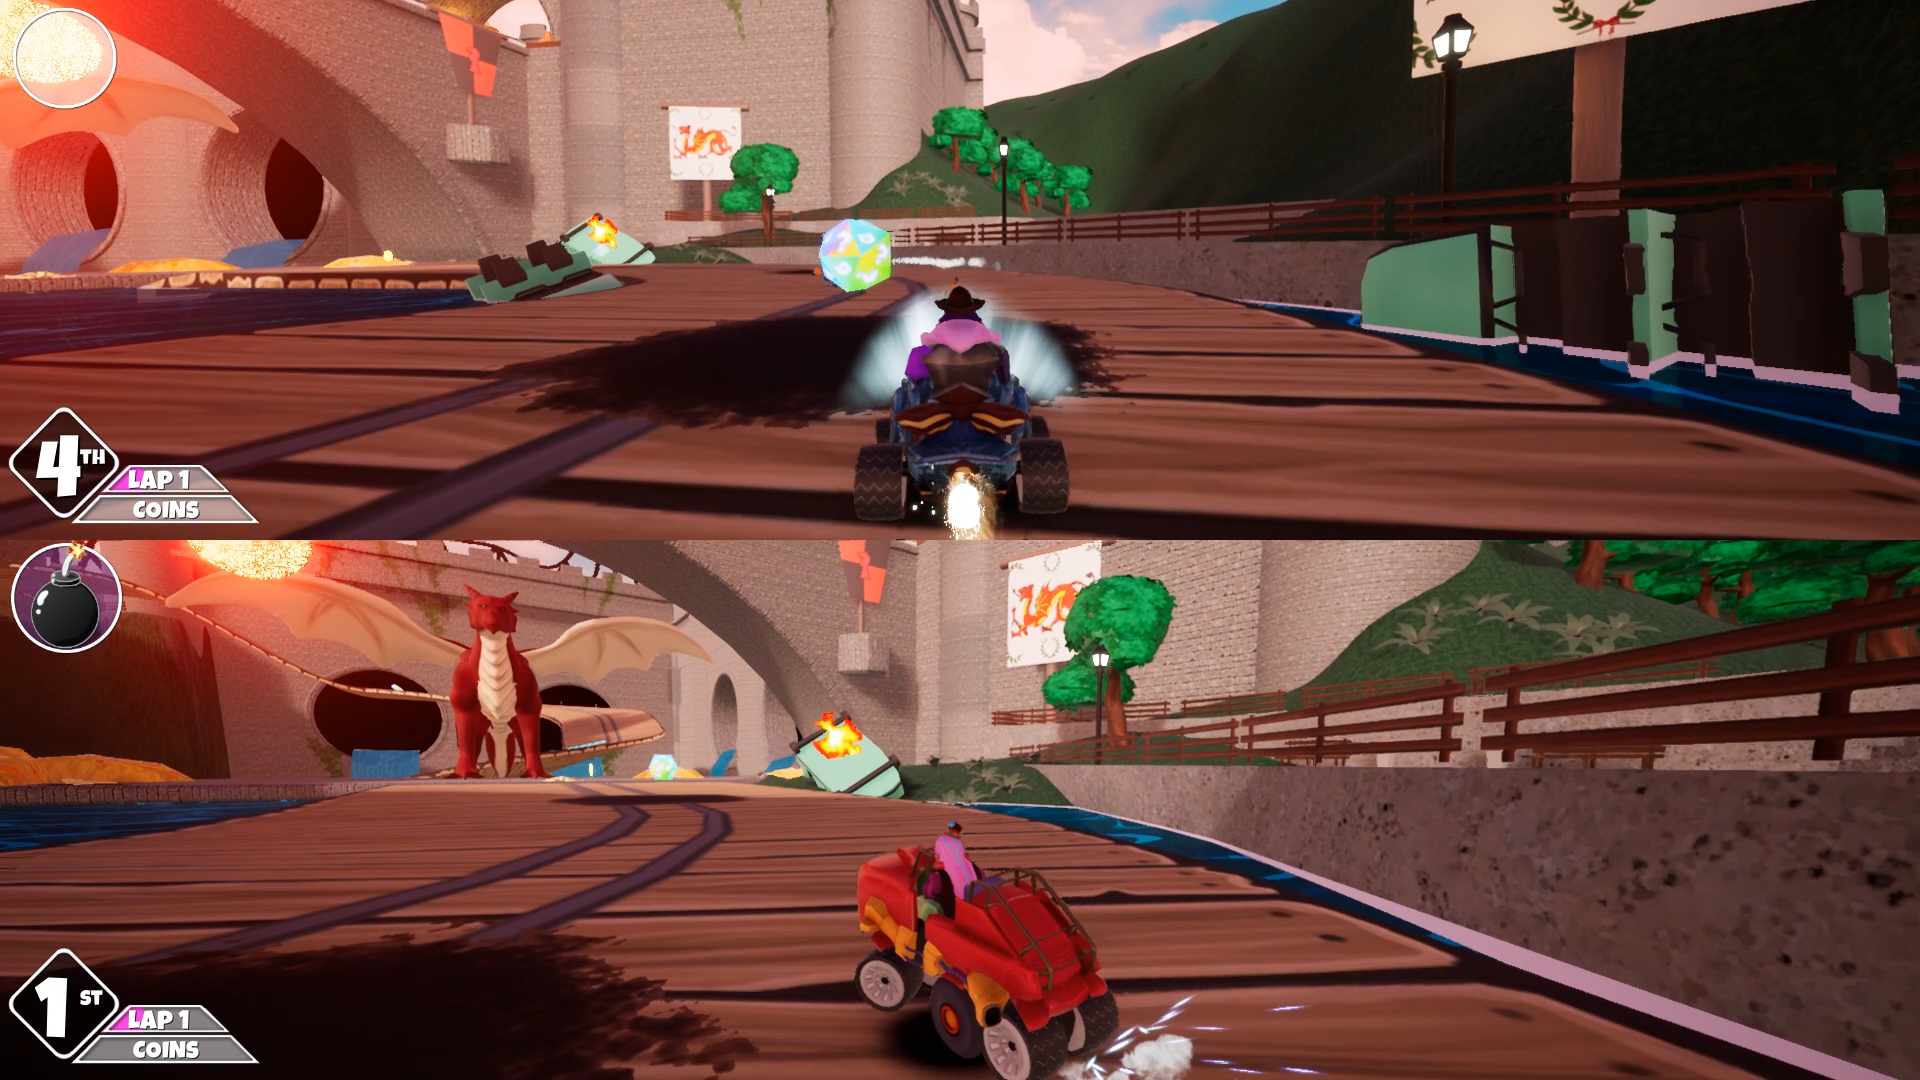
Split Screen System
The UI split-screen systems for Go Go-Karts were designed with the intent to allow easy modifications through the development and keeping all UI Widgets independent of each other. This was achieved by creating multiple UMG Widgets that could be added as part of the player’s screen layout.
Below is an example of an independent UMG widget for the player positioning system.
Here is an image of the core logic for the same:

By creating independent widgets to control specific parts of the user interface, designers could then easily implement split-screen views for each case (single-player or multi-player). This allowed for a fast development process while allowing changes in each sub-system to reflect on all player screen layouts.
Here’s the preview of the widget designer tab showing what the sub-component would look like:

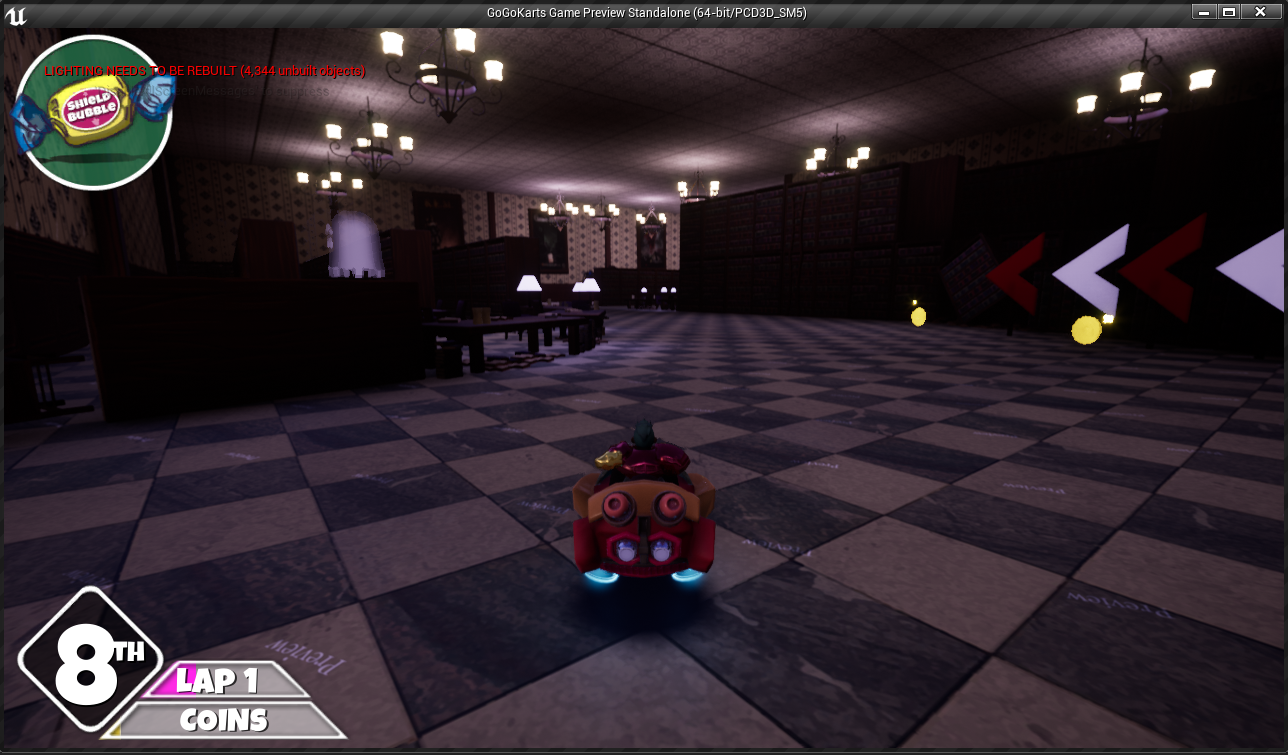
Below is an image of the single-player widget that shows the use of custom UI Widgets in-game.
This approach was maintained when developing the other HUD widgets such as the lap counter, coin meter, and item system.
Menu Systems
Each menu screen was broken down into UMG Widgets that served specific purposes. By doing so, the logic for each screen in the game was maintained in the corresponding UMG Widget. This allowed for easy feature addition, modifications to existing systems and easy bug isolation in the UI pipeline.
Here is an image of our Main Menu in-game.

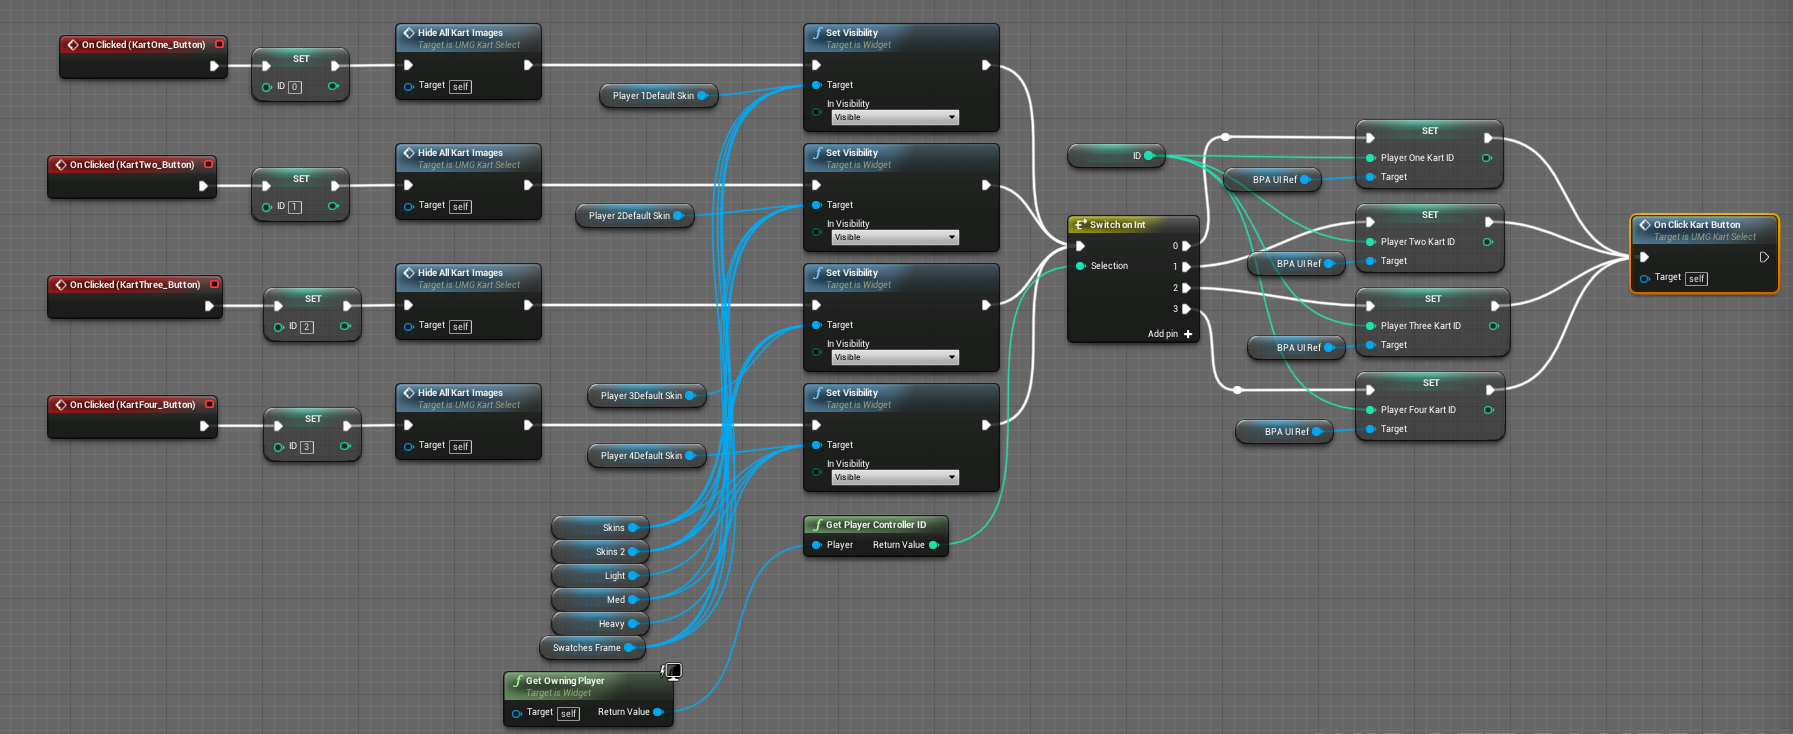
The core of this system was the selection block that allowed us to select a kart given a selection ID. This would then reflect on the widget by setting some images and UI element’s visibility.
Below is an image for the same:
Here is what the widget looked like in the designer tab:

One of the features required in the game UI was to have a tutorial section that displayed video playback of the various mechanics in-game. Developing this system needed to use the Unreal Media player and trigger specific content playback based on controller events.
Below is the blueprint implementation of the event graph for the tutorial screen implemented in-game.
The core of the tutorial logic was determining when to play the source, this had to happen on hover events received from either the keyboard and mouse or the focus event received from the controller. The core logic is described below:
Here’s an image of the same:

By using the media player in Unreal along with some of our gamepad controller highlight code, we were able to create a nice tutorial screen that let us toggle between different videos depending on what button was selected

Utility UI Systems
In addition to creating in-game UI, I also worked on developing UI Widgets that allowed performance analysis during the development process. One such widget is the FPS Counter which was designed to notify the developer when frame rates in the game were unstable or below the 60 FPS threshold. This widget was also developed with the intent to keep all logic independent of other game systems and implemented the use of a 5-second average FPS value while testing the game.
Below is the blueprint implemented for the FPS Counter for reference.
Here”s an image of the same:

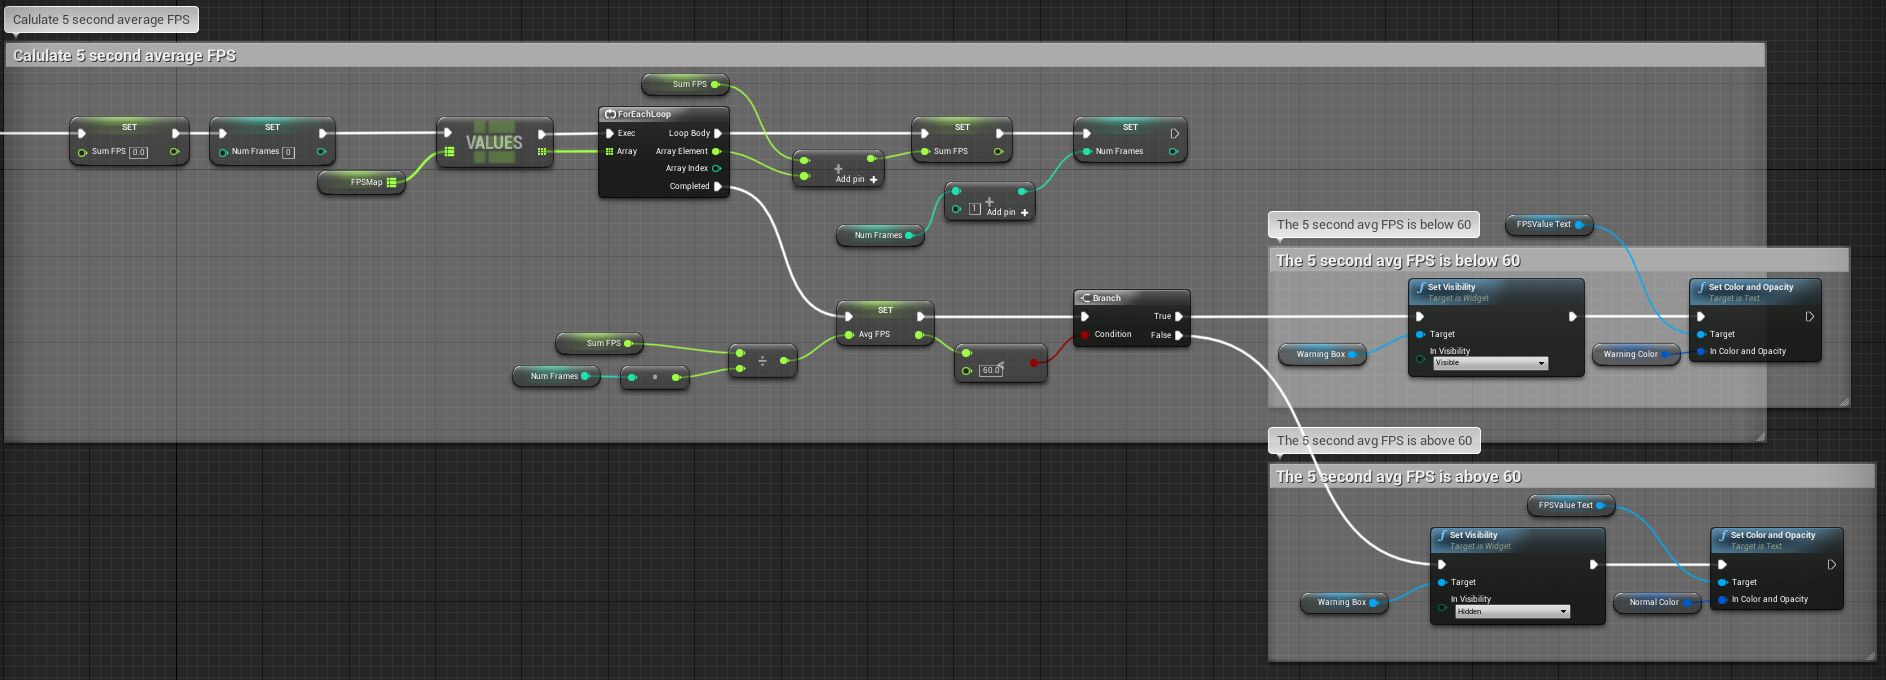
The FPS counter calculated an average frame rate over the span of 5 seconds based on the requirements from the leads team. Here is the logic implementation to calculate the average FPS along with a color indication on the widget for when the rate dropped 60 frames per second.
Below is an image of the same:
Below is an image of the FPS Counter being used for debugging during the bug fixing process.

Some other widgets that provided utilities for other developers included the widget to show screen warning when a player was being targeted with a missile. The blueprint implementation is as follows:
Here’s an image for the same:

This missile code was created on the missile launch and the brief logic on the missile widget allowed it to scale to the correct screen size based on the number of players.
Other such widgets include the end of race standings widget that allowed us to retrieve player information at the end of a race or at the end of the Grand Prix. Below is the logic for the same:
Below is an image for the same logic:

Generic Controller Support
One of the challenges of the UI development process was to read controller events. In the version of the Unreal Engine used for this project, UMG input events are not called for some states when using generic controllers. To counter this problem, I had to detect the current button that was focused on each frame and determine which visuals were to be displayed to the user.
Below is the blueprint logic for swapping slates based on controller events.

By using some tricks we were able to use the controller given the implementation of our codebase, this included slate swapping and focus checks on all UI widget elements each frame to give us the right widget to swap the slate for.
Retrospective
What went well 🙂
- Communication within the sub-team.
- Organized bug fixing pipeline
- Modular design implementation for UMG Widgets in-game.
- Rapid Iteration and use of Agile development methodology.
What went wrong 🙁
- Miscommunication between sub-team and leads team in the early stages of development.
- Difficulties in creating a good mini-map to convey player position and track layout.
- Poor task prioritization resulting in compromises on menu art.
What I learned 🙂
- Managing source control and clear folder structures is very important.
- Tackling controller input in the early stages of development makes future stages smoother.
- Validating assets in the game ensure good quality is maintained.
- Avoiding the “hacky” code in the early stages results in a smoother development process in the long run.
- Modular UI systems allow for changes to be made easier while development.
- Creating utilities for testing during development help isolate bugs faster.
- Systems must be designed early on with single and multi-player cases in mind.

Download our game here!